If you are looking for a detailed guide on how to implement Google Consent Mode V2 using Avacy, you are in the right place.
In this article, we will explore step by step the procedures required to effectively integrate this update with the Avacy consent management platform. From activating the consensus overview to creating the TAGs and verifying that the setup is correct, we cover every crucial aspect of the process.
What is Avacy
Avacy is a Consent Management Platform (CMP), developed with the support of a team of legal experts, which offers a complete solution for website and app compliance management enabling companies to manage regulatory compliance (GDPR) in an agile way.
Thanks to its ability to integrate with the industry's leading technologies, Avacy is the ideal solution to ensure compliance in a practical and cost-effective manner.
Its interface is easy to use, making it accessible to both professionals and users without previous experiencethus ensuring excellent usability for all.
In addition, Avacy offers direct customer support, thanks to which companies and professionals receive acontinuous and customised assistance.
But that's not all! If you want to know more about all the features of Avacy click here.
What are the steps to implement Google Consent Mode V2 with Avacy?
After having configured the Avacy CMP on your Site, the procedure to enable Google Consent Mode V2 might seem complicated, but with our guide below you will find all the steps clearly!
Let's see them together.
1. Enable consensus overview
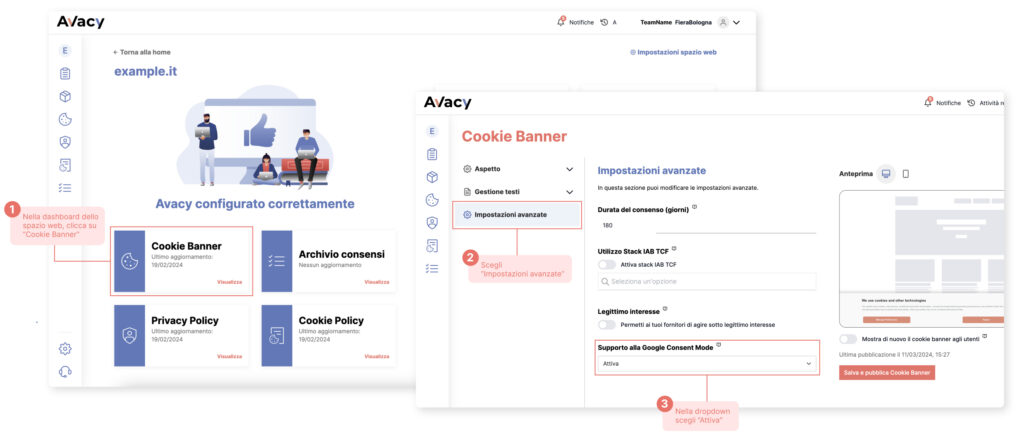
- Inside the Avacy web space click on "Cookie Banner", then go to "Advanced Settings" and in the dropdown "support for consent mode" select "Activate".
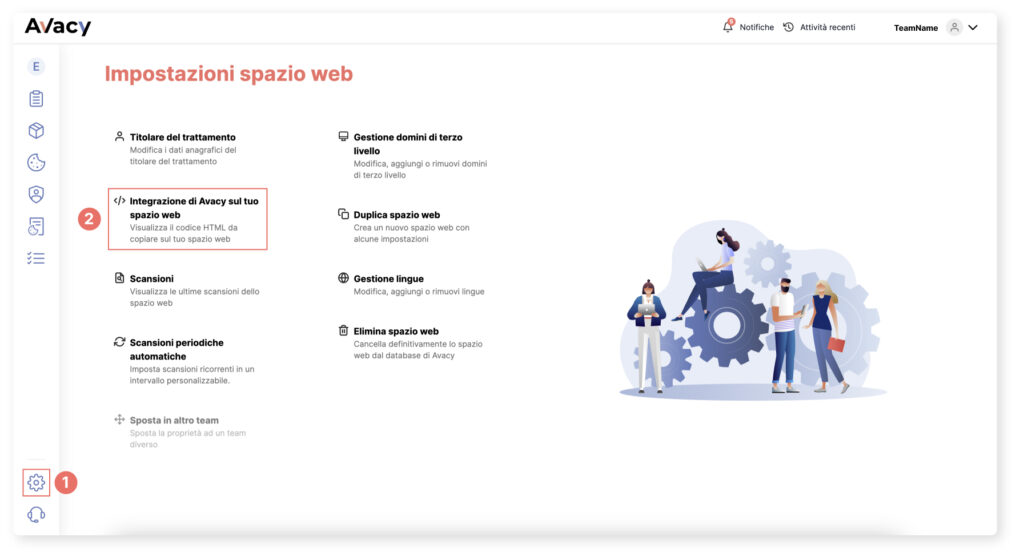
- Now go to Settings (click on the small wheel at the bottom left) and click on "Integration of Avacy on your web space".
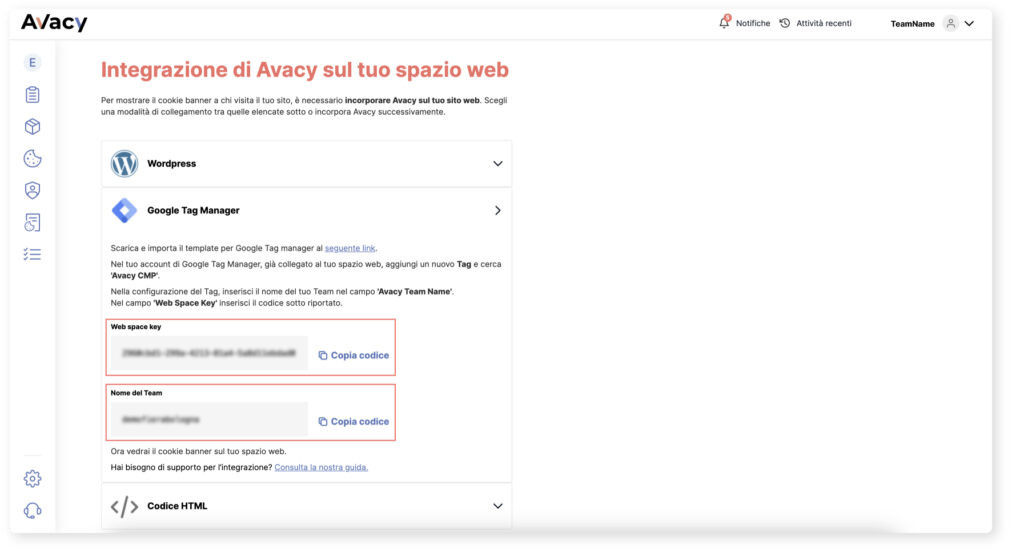
- Click on the 'Google Tag Manager' tab and copy the Web Space Key and the Team Name.
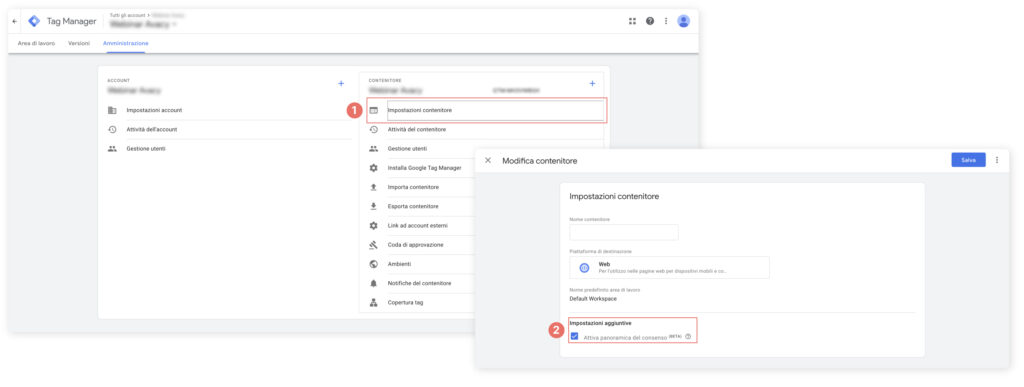
- Now open Tag Manager, go to 'Administration' and 'Container Settings'. Under "Additional Settings" tick the checkbox "Activate Consensus Overview". This will give you a global overview of the tags configured for Consent Mode.
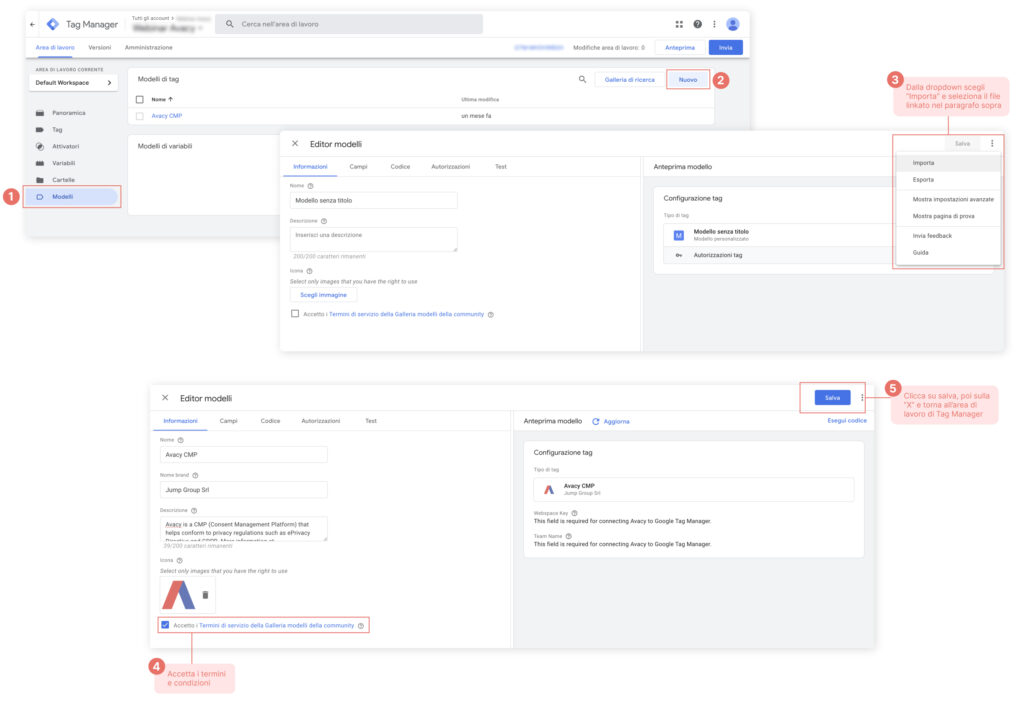
2. Creating the Avacy CMP TAG
- In Tag Manager, go to 'Templates' and create a New Model.
- Next, click on the 3 dots in the top right-hand corner, go to 'Import' and select this file after downloading it (you can also download the file here). Accept the terms and conditions and click on 'Save'.
- Close (by pressing the X) and return to the Tag manager work area.
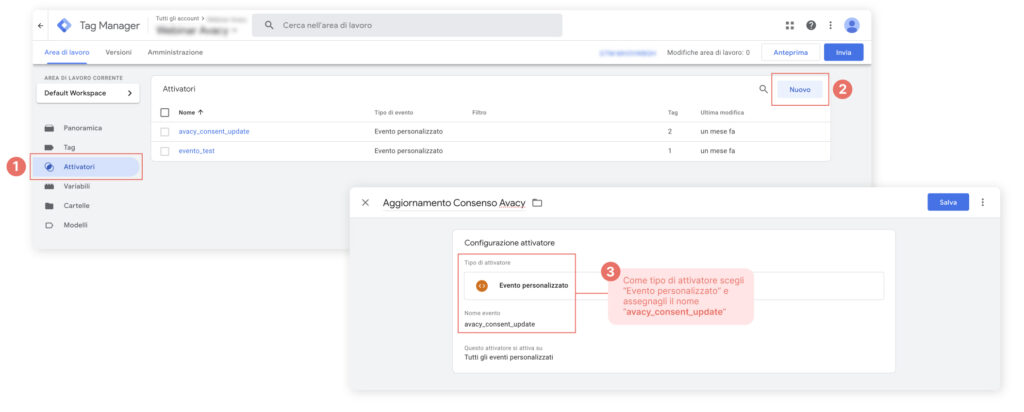
3. Creating the customised activator
- Create a customised activator by naming it avacy_consent_update
Avacy will send a custom event whenever there is a consent update from the user. Think for instance when a user consents to all cookies, or subsequently changes them: this event is handled by the custom activator avacy_consent_update.
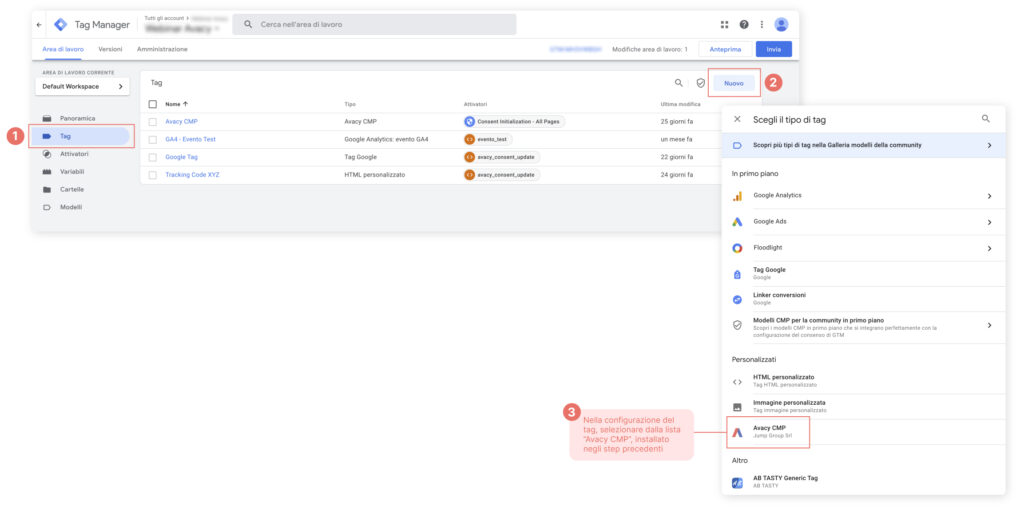
4. Adding the Avacy TAG
- Create Avacy Tag: select Tag and click on 'New'.
- From the list, select customised tag "Avacy CMP" that was installed in the previous steps (see step 2).
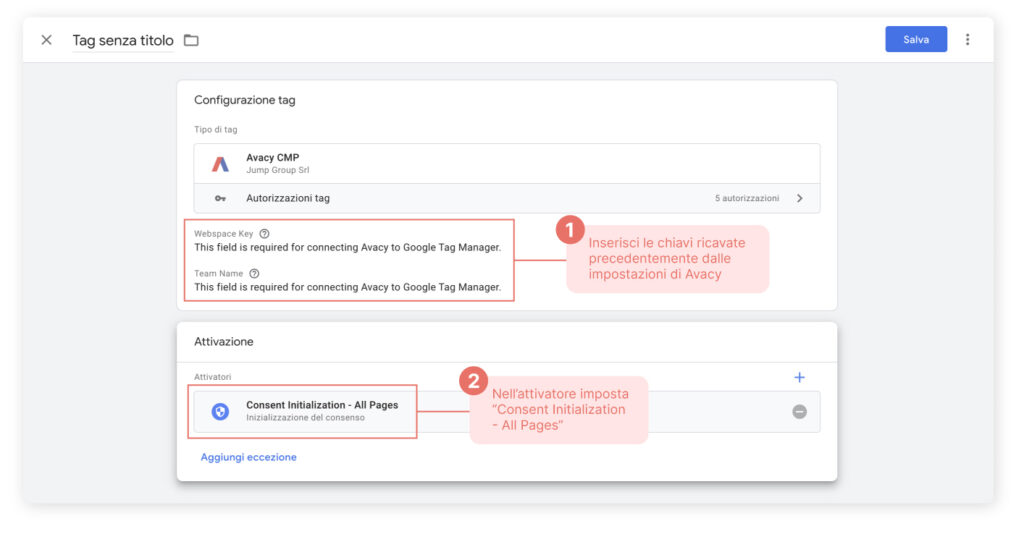
- Enter the data you obtained from the Avacy settings from the previous steps (Web Spaces Key and Team Name: see step 1).
- In the activator, set to 'Consent Initialisation - All Pages".
How are you doing so far?
If you need a FREE consultation write to support@avacysolution.com
or
5. Modifying TAGs for consent mode
At this point we move on to the configuration of the tags.
Tags can be divided into two macro-categories:
- I Google tagssuch as analytics or Google Ads tags. This type of tag has the native support for consent mode.
- All other tracking codesall other types of tags, such as Facebook, Tik Tok and others.
Configuring Google Tags with Consent Mode v2
Let's start with Google Tags.
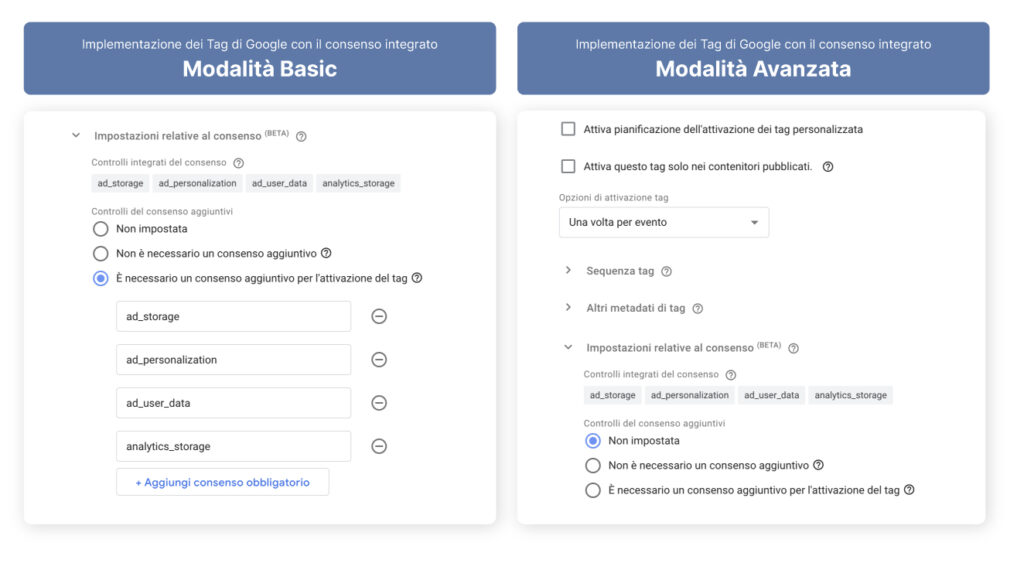
To continue with the next steps, keep in mind that the two configuration modes introduced with Consent Mode v2 are as follows:
- BASIC configuration: in this mode, if users deny cookie consent, no data is transmitted to Google, not even in aggregated or anonymous form. This configuration represents the most restrictive and conservative approach to consent management, particularly suitable if you do not conduct marketing or advertising campaigns on platforms like Meta or Google Ads.
- ADVANCED configuration: unlike the basic version, the advanced mode continues to send data to Google in aggregated and non-identifiable form even if users do not accept cookies. This approach maintains the traditional Consent Mode operation, offering greater flexibility for those conducting online marketing and advertising campaigns.
Let us take as an example the Google configuration tagsUnder 'Advanced Settings' go to 'Consent Settings'. Here you will find three choices:
- Not set
- No additional consent required
- Additional consent is required to activate the tag

If you select the "Not set" you will enter the advanced consent mode. Conversely, by selecting the "Additional consent is required to activate the tag" will be activated basic mode and the Google tag will not be activated when the user rejects these flags. In the latter case, ad_storage, ad_personalisation, ad_user_data and analytics_storage must be set manually.
Whichever mode is chosen, the activation of this tag must be set to thecustomised event you configured earlier, i.e. avacy_consent_update (see step 3).
This customised Avacy activator is important because when the user accesses the page, they do not instantly click 'accept' or 'reject' in the cookie banner. The Avacy activator therefore 'listens' until the user interacts with the cookie banner and expresses their preferences.
Configure all other tracking codes
The major innovation introduced by consent mode v2 concerns the advanced mode by which it is possible to receive data even without the user's explicit consent, provided it is in aggregated form.
However, this type of tracking only concerns Google tags. For all other tracking codes, such as Meta, Linkedin or Tik Tok, it is necessary to follow the basic implementation.
Then, follow the steps below:
- Within the tag configuration go to 'Advanced Settings'.
- Under 'Consent Settings' select 'Additional consent is required for tag activation'.
- Set the activator to thecustomised event you configured earlier, i.e. avacy_consent_update (see step 3).
In this case, events will only be activated if the user consents to data tracking.
How to check that the setup is correct: Debug Google Consent Mode v2
Once we have followed all the steps above, all that remains is to check that the setup is correct! To do this, it is important to monitor two fronts: on the one hand the Tag Manager debug, so as to verify that the consent status is correctly registered, and on the other hand the web page itself which, thanks to a plugin, verifies in real time what the user's consent status is. Let's see them together:
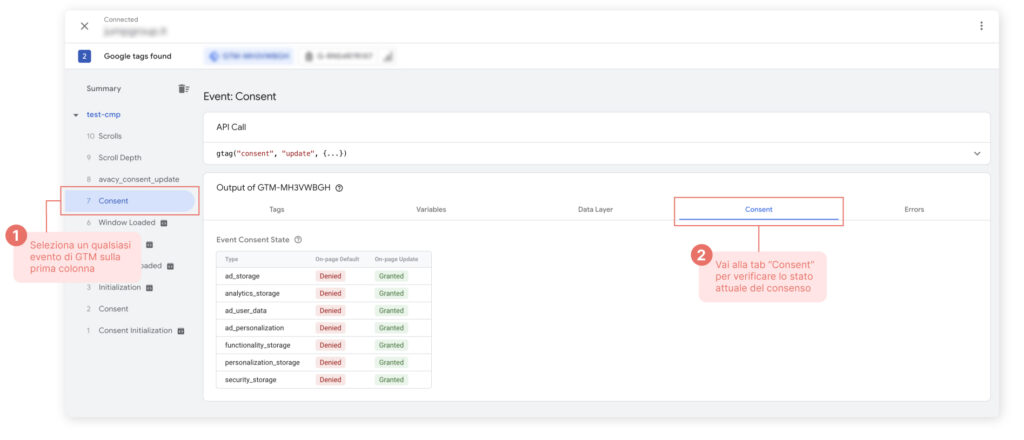
1. Using the GTM debugger
- Select a any Google Tag Manager event on the first column.
- Go to the 'Consent' tab to check the current status of consent.
It is possible to monitor which tags have been blocked by consent mode.
In the case of the advanced mode the Google Tag started despite the denied consent to all flags while the generic tracking code was correctly blocked.
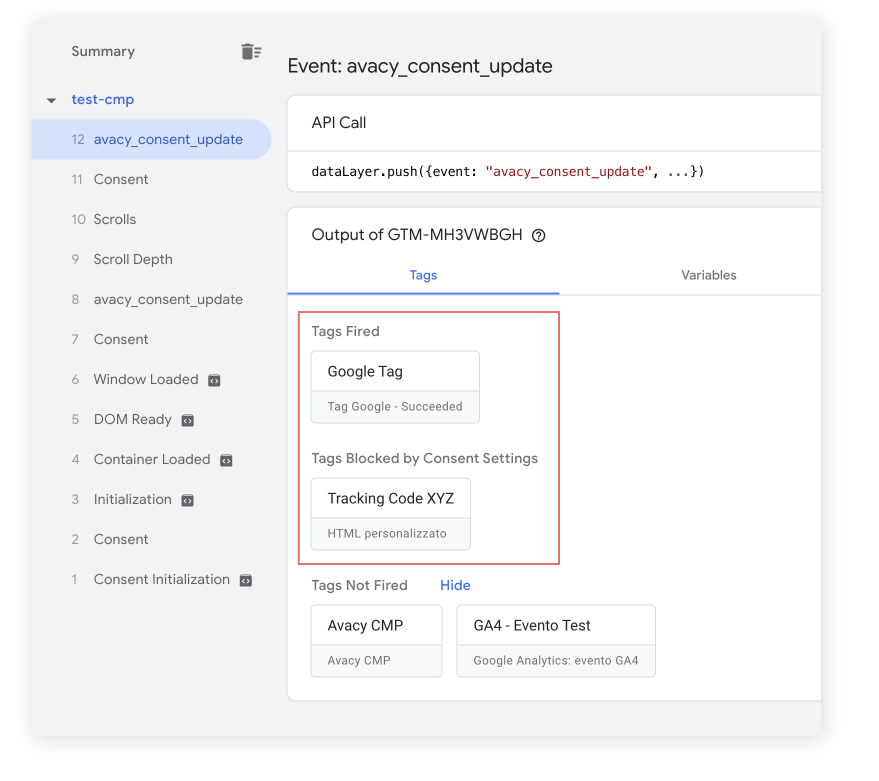
In the case of the Basic mode, consent was also given on the Google Tag. Both were therefore blocked.

If you display this message: 'A tag read consent state before a default was set', but the default state was set correctly at the Consent Initialisation level, this is a false alarm.
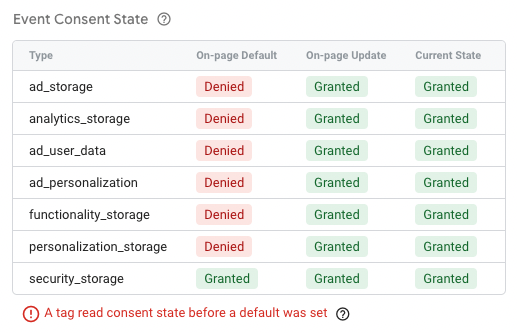
If you still want to remove it, simply insert the following script on the page before the gtag:
<script>
window.dataLayer = window.dataLayer || [];
function gtag(){dataLayer.push(arguments);}
gtag('consent', 'default', {
  'ad_storage': 'denied',
  'ad_user_data': 'denied',
  'ad_personalization': 'denied',
  'analytics_storage': 'denied'
});
</script>
2. Use the InfoTrust plugin for Chrome
InfoTrust is a leading digital solutions company specialising in data analysis and digital marketing. Among its services, InfoTrust provides adedicated debugging extension for Chrome and monitor consensus status and shows the payload of data sent to Google, facilitating the optimisation of marketing strategies and regulatory compliance.
There are three tabs in the plugin:
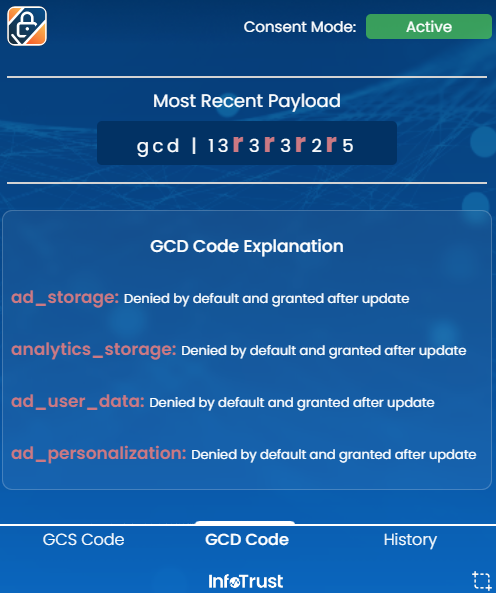
- the Google Consent State (GCS), or Google Consensus State, or a coding used to indicate the consent status for various Google services.
- GCD CodeIt also includes the history of what the user has done with the consent.
- History: encodes values for all four consensus signals (ad_storage, analytics_storage, ad_user_data and ad_personalisation) and includes information on how the consent signal was generated.
In particular, we will find the following entries:
- G100: No consent was granted.
- G110: Google Ads has consent, Google Analytics does not.
- G101: Google Analytics has consent, Google Ads does not.
- G111: Both Google Ads and Google Analytics have consent.
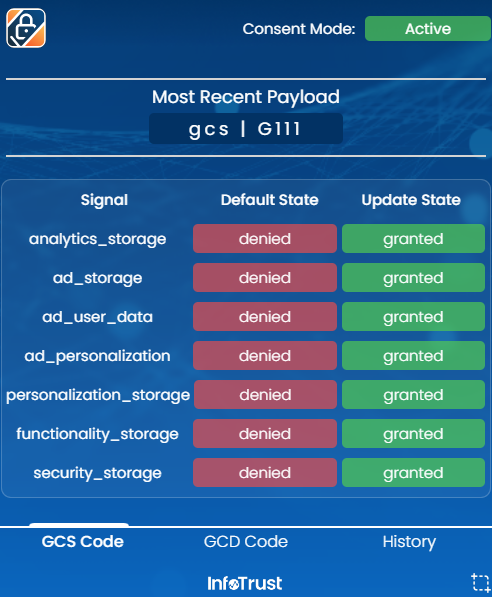
To view this information, simply load the web page and click on the InfoTrust extension in the top right of the Chrome window.
3. Warning on Google services (e.g. GA4)
In the event that GA4 o Google Ads receive events without the various flags of consent mode, Google will promptly show you a warning in the backend.
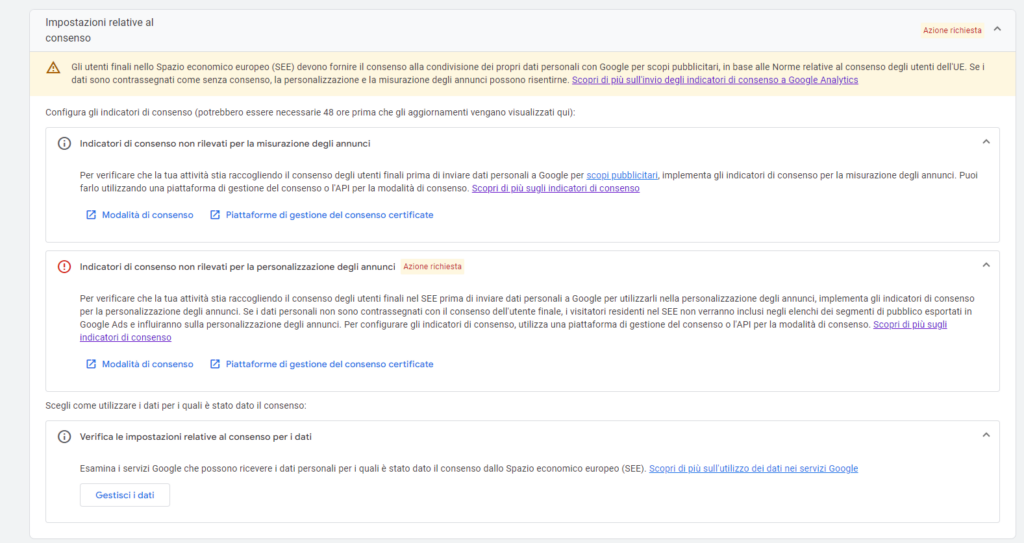
Once the issue is resolved, however, the window will not disappear automatically (it may take several days).
Watch the webinar Google Consent Mode V2 explained simply
Did you find all the proposed steps clear and easy to follow?
If you would like further support, why not watch the dedicated webinar?